This is the third part in a series of posts for non-experts about setting up an Ioke development environment on Linux. Please see the previous posts to start at the beginning:
The emacs-starter-kit is a set of base configuration for Emacs. It contains a number of useful elisp libraries, with a slight focus on dynamic languages.
To install it, perform the following steps (note that we move any existing Emacs configuration out of the way first to avoid stomping what you currently have):
~/work/emacs$ cd
~$ mv .emacs.d .emacs.d.old
~$ mv .emacsrc .emacsrc.old
~$ git clone git://github.com/technomancy/emacs-starter-kit.git .emacs.d
If you now start Emacs again you’ll see that the menu bar and the toolbar is gone. This is the default in emacs-starter-kit as most Emacs users don’t find them useful. For new users the menu bar can sometimes come in handy, to get it back temporarily, just press F1.
Configuring Emacs
If you want to add your own customizations to Emacs when using emacs-starter-kit, just add an Emacs LISP file called username.el, or hostname.el, in the ~/.emacs.d directory. For instance, to make the menu bar always visible:
- Open Emacs, if it’s not open already.
- Press
C-x C-fand type in:~/.emacs.d/username.el
Where username is the name you log in with (for instance, in my case the complete filename ismelwin.el). - Type in the following in the file:
(menu-bar-mode 1)And save the file with
C-x s. - Now quit (
C-x c) and restart and you’ll see that the menu bar is shown.
Working with Magit
emacs-starter-kit includes, among many other things, the very nice Magit Git mode for Emacs, which gives you a nice interface for working with a Git repository.
Let’s use this mode to commit our recent changes to the configuration file to our local clone of the emacs-starter-kit repository. This helps us track changes we make and also makes a backup of the file in case we screw (sorry, mess) something up.
Note 1: To move easily between Emacs windows using the keyboard, just press Shift and the arrow key pointing in the direction you want to move.
Note 2: To only show the current Emacs window - press: C-x 1
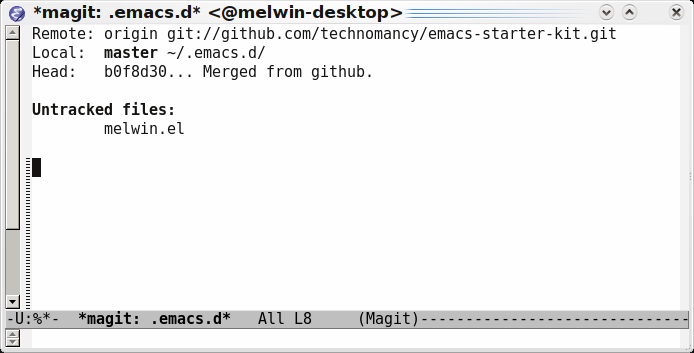
- Inside Emacs, press `C-x g` to run `magit-status` and enter the directory (note that `Tab` auto-completes): `~/.emacs.d`

- Put the cursor over the `username.el` in the list of `Untracked files`.
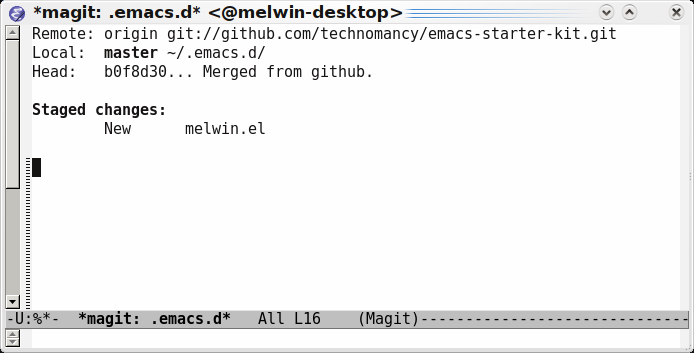
- Press `s` to Stage the new file - this adds the file to the Git staging area, from which all files are committed.

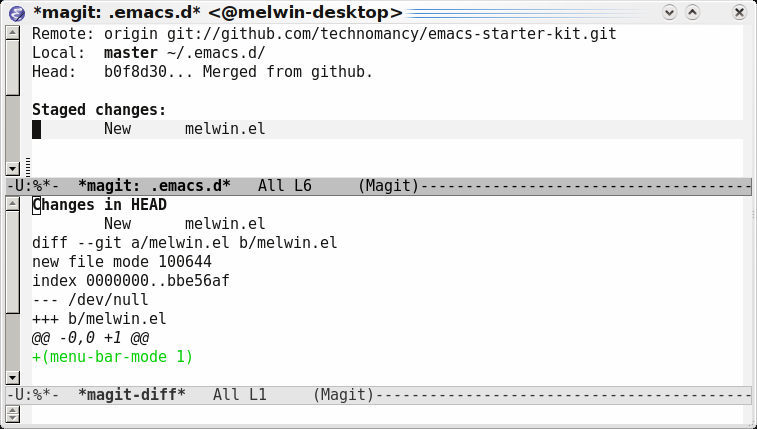
- Press `d` and then accept to diff against HEAD - this will show you a diff view of the changes we have staged - just the add of a single file.

- Press `c` to perform the commit. This opens a new buffer into which a commit message can be added.
- Write something like: `Add personal configuration file.`
- Now press `C-c C-c` to commit the file.
That’s it - now the change has been committed to the local clone of the emacs-starter-kit Git repository.
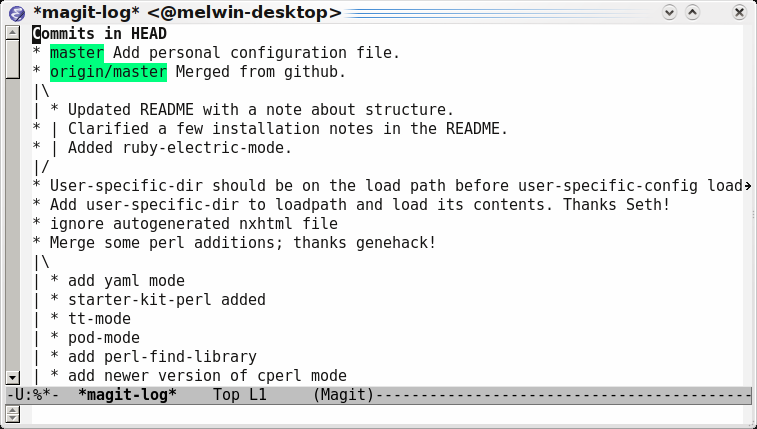
To see the log of all commits, press l (lowercase L) in the magit-status buffer:

To look at a certain commit - just press Enter on it and a view of the diff will be shown. This makes it quite easy to browse through commits in a repository. At the top of the log is the most recent commit, which in this case is the file we just added.
To update emacs-starter-kit with the latest changes in the GitHub repository, just press F in the magit-status buffer or run git pull in the ~/.emacs.d directory.
Summary
Now that we have Git and Emacs set up we can finally move to Ioke. In the next post we’ll go through installing the latest Java JDK and getting and compiling the Ioke source code.
Join me then!
/M
Update: Part 4: Java and Ant